sewing guides for sewing machines
A comprehensive guide to sewing machines offers essential knowledge for beginners and experienced sewists alike, covering machine basics, fabric preparation, and advanced techniques to enhance sewing skills․
Overview of Sewing Machines and Their Importance
Sewing machines are indispensable tools for crafting, repairing, and creating textiles․ They offer versatility, efficiency, and precision, enabling users to handle various fabrics and projects with ease․ From basic mechanical models to advanced computerized versions, these machines cater to different skill levels and needs․ Their importance lies in their ability to streamline sewing processes, ensuring professional results․ Regular maintenance, such as cleaning and proper threading, is crucial for optimal performance․ Understanding the machine’s capabilities and care extends its lifespan and enhances sewing experiences․
Basic Sewing Techniques Every Beginner Should Know
Mastering basic sewing techniques is essential for beginners․ Start by learning to thread the machine correctly and sew a straight line․ Backstitching at the beginning and end of seams ensures durability․ Practice turning fabric right side out and pressing seams for a professional finish․ Understanding fabric grain and using the right needles and threads is crucial․ Simple projects like stitching straight lines or hemming fabric build confidence․ These foundational skills lay the groundwork for more complex projects, helping beginners progress smoothly in their sewing journey․
Choosing the Right Sewing Machine
Selecting the ideal sewing machine involves considering factors like budget, skill level, and project types․ Mechanical machines are great for basics, while computerized models offer advanced features for versatility and precision, catering to both beginners and experienced sewists․
Types of Sewing Machines: Mechanical, Computerized, and Overlock
Mechanical sewing machines are durable, simple, and ideal for basic tasks, offering limited stitch options․ Computerized machines provide advanced features like automatic threading, numerous stitch options, and wireless connectivity․ Overlock machines, or sergers, are specialized for finishing seams professionally, preventing fraying, and creating a polished look․ Each type caters to different needs, whether for home use, heavy-duty projects, or professional results, ensuring sewists can choose the perfect tool for their creative or practical requirements;
Factors to Consider When Selecting a Sewing Machine
When choosing a sewing machine, consider your intended use, budget, and skill level․ Mechanical machines are great for basic tasks, while computerized models offer advanced features like automatic threading and stitch customization․ Overlock machines are ideal for finishing seams․ Think about the types of fabric you’ll work with, as some machines handle heavy-duty materials better than others․ Brand reputation, maintenance needs, and additional features like wireless connectivity or embroidery options should also influence your decision․ Reading reviews and comparing models can help you find the perfect fit for your sewing projects․
Best Sewing Machines for Beginners
For beginners, the Janome Magnolia 7318 and Brother CS6000i are excellent choices, offering ease of use and essential features․ These machines provide a variety of built-in stitches, automatic needle threading, and free-arm sewing for versatility․ They are durable, budget-friendly, and come with comprehensive guides․ Singer Heavy Duty 4423 is another top pick, known for its robust construction and ability to handle thick fabrics․ These models are ideal for learning basic sewing techniques and transitioning to more complex projects as skills improve․ They are highly rated for reliability and user-friendly design, making them perfect for newcomers to sewing․
Advanced Sewing Machines for Experienced Users
Experienced sewists often opt for high-end models like Bernina 880, Husqvarna Viking Designer, or Pfaff Creative 4․5․ These machines feature advanced computerized interfaces, WiFi connectivity, and specialized sewing feet for intricate stitching․ They offer extensive stitch libraries, embroidery capabilities, and precision control, ideal for complex projects․ With large touchscreens and customizable settings, these machines cater to professionals seeking versatility and high-quality results․ They are designed to handle thick fabrics and delicate materials with ease, making them perfect for advanced techniques like quilting, embroidery, and heavy-duty sewing․
Understanding Your Sewing Machine

- Familiarize yourself with key components like the bobbin, presser foot, and tension dials․
- Regular maintenance, including cleaning and oiling, ensures smooth operation․
- Refer to your machine’s manual for specific care and troubleshooting tips․
Key Components of a Sewing Machine
Understanding the key components of your sewing machine is essential for effective use․ The bobbin holds the bottom thread, while the spool pin secures the top thread․ The presser foot keeps fabric in place, and the tension dials regulate thread tightness․ The stitch selector allows you to choose stitch types, and the feed dogs move fabric smoothly․ Additional features like the reverse stitch lever and free arm enhance functionality․ Familiarizing yourself with these parts ensures better control and precise stitching, making your sewing experience more efficient and enjoyable․
Understanding Stitch Types and Their Uses
Modern sewing machines offer a variety of stitches, each designed for specific tasks․ The straight stitch is ideal for basic sewing and repairing, while the zigzag stitch is perfect for stretchy fabrics and preventing fraying․ The backstitch reinforces seams, ensuring durability․ Decorative stitches, like the blind hem or embroidery stitches, add a professional touch to hems or embellishments․ Understanding these stitches enhances your sewing versatility, allowing you to tackle diverse projects with precision and confidence․ Experimenting with different stitches can elevate your creations and expand your sewing capabilities․
How to Properly Thread and Tension Your Sewing Machine
Properly threading and tensioning your sewing machine is crucial for smooth operation․ Begin by removing any debris or dust from the machine, especially between the feed dogs․ Thread the machine according to the manufacturer’s guide, ensuring the thread passes through all tension discs and the take-up lever․ Adjust the tension by gently pulling the thread; it should feel snug but not overly tight․ Incorrect tension can cause uneven stitches or fabric puckering․ Always test the thread on a scrap piece of fabric before starting your project to ensure the machine is properly set up․
Regular Maintenance Tips for Sewing Machines
Regular maintenance ensures your sewing machine runs smoothly and lasts longer․ Start by removing dust and lint, especially from the feed dogs and bobbin area, using a small brush or vacuum․ Apply a few drops of sewing machine oil to moving parts, like the needle bar and hook race, to keep them lubricated․ Avoid over-oiling to prevent attracting dust․ Clean the machine after each project and store it in a dry, cool place․ Check and replace worn parts, such as needles and belts, to maintain optimal performance and prevent damage․

Fabric Preparation and Handling
Proper fabric preparation ensures smooth sewing․ Pre-wash and iron fabrics to remove shrinkage and wrinkles․ Accurately measure and cut patterns, considering grain lines for stability and professional results․
Choosing the Right Fabric for Your Project
Selecting the appropriate fabric is crucial for successful sewing․ Consider the project’s purpose, season, and desired texture․ For beginners, cotton is ideal due to its ease of handling and durability․ Knit fabrics are perfect for stretchy garments, while woven fabrics suit structured pieces like dresses or home decor․ Always pre-wash fabric to ensure shrinkage is accounted for, and choose patterns that complement the fabric’s drape․ Proper fabric selection enhances both the sewing process and the final result’s quality․
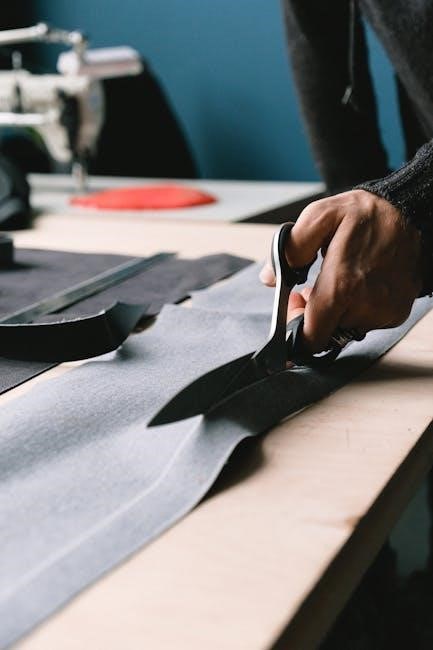
Measuring and Cutting Fabric Accurately
Accurate measuring and cutting are foundational to successful sewing projects․ Use a sewing gauge or measuring tape to ensure precise measurements, and always cut on a stable surface․ Rotary cutters and mats are ideal for straight cuts, while scissors work well for curved edges․ Pre-wash fabric to avoid shrinkage and iron it before cutting․ Follow pattern guidelines or create templates for consistency․ Double-check measurements to prevent errors, as incorrect cuts can ruin a project․ Proper technique ensures professional results and minimizes fabric waste, making the sewing process more efficient and enjoyable․
Interfacing and Stabilizing Fabric
Interfacing and stabilizing fabric are crucial steps for achieving professional results in sewing․ Interfacing adds structure to fabrics, preventing stretching and distortion, especially in areas like collars and buttonholes․ Choose the right type—fusible or sew-in—based on your fabric and project needs․ Stabilizers, such as Vilene or interfacing, are applied to the wrong side of fabric before sewing․ Proper application ensures a smooth finish and durability․ Always follow manufacturer instructions for fusible interfacing to avoid bubbles or misalignment․ This step is essential for maintaining the integrity of your seams and overall garment shape, ensuring a polished final product․
Pre-Washing and Ironing Fabric
Pre-washing and ironing fabric are essential steps before sewing to ensure the best results․ Washing fabric removes excess dyes, finishes, and impurities, preventing shrinkage and color bleeding after sewing․ Always check the fabric care label for specific instructions․ Ironing fabric before cutting ensures accuracy in measurements and a smooth sewing process․ Use the appropriate temperature setting to avoid damaging delicate materials․ This preparation step guarantees that your fabric behaves predictably, allowing you to achieve precise cuts and professional-looking seams․ Properly prepared fabric is the foundation of successful sewing projects․
Basic Sewing Techniques
Mastering basic sewing techniques is crucial for every sewer, starting with straight stitching, backstitching, and turning fabric right side out to create secure, professional seams effortlessly․
How to Sew a Straight Line
Sewing a straight line is a fundamental skill for beginners․ Start by selecting the straight stitch on your machine and threading it properly․ Place your fabric under the presser foot, aligning the edge with the machine’s guide․ Hold the fabric steady and gently pull it as it moves․ Keep your eyes on the guide to maintain a straight path․ Use a slow, consistent pace to ensure even stitching․ Backstitch at the beginning and end for secure seams․ Practice on scrap fabric to build confidence and precision․
Backstitching for Secure Seams
Backstitching is essential for securing seams, especially at the start and end of a line of stitching․ Begin by sewing a few reverse stitches, then continue forward in a straight line․ This technique reinforces the seam, preventing it from unraveling․ It’s particularly useful for heavy fabrics or areas of high stress․ Use the backstitch option on your machine or manually reverse stitch․ Always backstitch at both ends of a seam for durability and professional-looking results․ This simple step enhances the longevity of your sewing projects․
Turning Fabric Right Side Out
Turning fabric right side out is a fundamental step in sewing, ensuring seams are hidden and the project looks professional․ After sewing with the wrong side facing up, carefully trim excess seam allowances to prevent bulk․ Use scissors or a rotary cutter for precise trimming․ Gently turn the fabric right side out through the opening, making sure corners are sharp by poking them with a blunt tool․ Press the seams with an iron to flatten them․ This technique is crucial for creating clean, polished finishes in garments, bags, and home decor projects․ Always handle delicate fabrics with care during this process․
Finishing Seams Professionally
Finishing seams professionally ensures durability and a polished look․ Techniques include zigzag stitching, serging, or binding․ For woven fabrics, zigzag stitch prevents fraying․ Serging with an overlock machine encases edges neatly․ Binding involves wrapping seams with fabric strips․ Always press seams after finishing for a crisp appearance․ For delicate fabrics, use a walking foot or Teflon foot to prevent dragging․ Regularly cleaning the machine and using the right thread type enhances results․ Properly finished seams prolong garment life and maintain professional-quality craftsmanship, making it essential for both beginners and experienced sewists to master these methods․

Advanced Sewing Techniques
Advanced sewing techniques elevate your projects with precision and style․ Mastering buttonholes, zippers, hems, and embroidery with specialized feet and decorative stitches brings your creativity to life․
Creating Buttonholes
Creating buttonholes is a versatile skill that enhances garments and accessories․ Use your sewing machine’s buttonhole feature or manually sew them with a zigzag stitch․ Start by marking buttonhole placement on fabric․ Use a buttonhole foot for precision and stabilize fabric with interfacing․ Select the appropriate stitch length and width․ Test on scrap fabric first․ For manual buttonholes, sew a rectangle and cut the center․ Reinforce stress points with backstitching․ Proper alignment and tension ensure professional results․ Practice makes perfect for consistent, functional buttonholes․
Installing Zippers
Installing zippers is a fundamental skill for sewists, adding functionality to garments and accessories․ Start by preparing the fabric, marking the zipper placement with pins or chalk․ Use a zipper foot for precision, ensuring the zipper aligns with the fabric edges․ Sew along the marked lines with a straight stitch, backstitching at the beginning and end for security․ Press the seams to flatten them․ For a professional finish, topstitch around the zipper․ Practice on scrap fabric to master alignment and tension, ensuring smooth operation․ Proper installation enhances both durability and aesthetics of your projects;
Sewing Hems
Sewing hems is a basic yet essential technique for completing garments and home decor items․ Fold the fabric edge by the desired hem allowance, pressing to create a crisp crease․ Use a straight stitch or blind hem stitch to sew along the folded edge, ensuring a seamless finish․ For heavier fabrics, consider using a heavy-duty needle or specialized hemming feet․ Backstitch at the start and end for durability․ Press the hem again to flatten it, achieving a professional look․ This technique is versatile for dresses, pants, and curtains, ensuring clean and polished results in any sewing project․
Embroidery and Decorative Stitches
Embroidery and decorative stitches add a creative touch to sewing projects, allowing for personalized designs and intricate patterns․ Many modern sewing machines come with built-in embroidery stitches, enabling users to create beautiful designs effortlessly․ From floral motifs to geometric patterns, these stitches can enhance fabrics for quilting, apparel, and home decor․ Advanced machines may even offer Wi-Fi connectivity, allowing users to download custom embroidery designs directly․ With practice, sewists can master these stitches to add unique flair to their creations, making every project truly one-of-a-kind․
Troubleshooting Common Sewing Machine Issues
Identify and resolve common sewing machine problems, such as thread breakage or uneven stitching, by understanding error codes and performing routine maintenance to ensure smooth operation․
Identifying and Fixing Common Sewing Machine Problems
Common sewing machine issues include thread breakage, uneven stitching, and jammed fabric․ Identifying these problems often involves checking for dust buildup, incorrect tension, or misaligned needles․ Regular cleaning between feed dogs and proper threading can prevent many issues․ For computerized machines, error codes provide specific guidance․ If problems persist, consulting the user manual or contacting a professional is advisable to avoid further damage and ensure optimal performance․ Proper maintenance and timely repairs can extend the machine’s lifespan and improve sewing quality significantly over time․
Understanding Error Codes on Computerized Machines
Computerized sewing machines often display error codes to indicate specific issues, such as thread jams, needle problems, or sensor malfunctions․ These codes, like “E1” or “E3,” are unique to each model and can be found in the user manual․ Regularly cleaning sensors and checking thread tension can prevent many errors․ If an error persists, restarting the machine or consulting the manual for troubleshooting steps is recommended․ Advanced issues may require professional assistance to avoid damaging the machine․ Understanding these codes helps users address problems efficiently and maintain their machine’s performance․
When to Call a Professional for Repairs
While minor issues like thread jams or needle breakage can often be resolved with DIY troubleshooting, complex problems such as faulty sensors, broken gears, or electrical malfunctions require professional attention․ Attempting to fix these issues yourself can lead to further damage or safety hazards․ Certified technicians have the expertise and tools to diagnose and repair advanced problems, ensuring your machine operates optimally․ Always consult the user manual or contact authorized service centers for reliable assistance․ Professional repairs are a worthwhile investment to extend the lifespan of your sewing machine․
Resources and Continuous Learning
Explore sewing tutorials, guides, and online communities for continuous learning․ Stay updated with sewing trends and techniques to enhance your skills and creativity in sewing projects․
Best Sewing Tutorials and Guides Online
Discover a wealth of sewing tutorials and guides online, perfect for all skill levels․ From basic stitching to advanced techniques, these resources offer step-by-step instructions, video demonstrations, and downloadable patterns․ Popular platforms provide comprehensive lessons, while sewing communities share tips and inspiration․ Utilize these tools to improve your sewing skills, tackle complex projects, and explore creative ideas․ Whether you’re a beginner or an experienced sewist, online tutorials and guides are invaluable for continuous learning and project success․
Joining Sewing Communities
Joining sewing communities connects you with fellow enthusiasts, offering inspiration, support, and shared knowledge․ Online forums, social media groups, and local meetups provide platforms to discuss projects, share tips, and learn from others․ These communities often feature tutorials, Q&A sessions, and reviews of sewing tools․ Engaging with others passionate about sewing fosters creativity and helps troubleshoot challenges․ Whether online or in-person, sewing communities are invaluable for networking, gaining insights, and staying inspired throughout your sewing journey․
Staying Updated with Sewing Trends
Staying updated with sewing trends ensures you remain inspired and informed about the latest techniques, tools, and fabrics․ Follow sewing blogs, social media, and online courses to discover new patterns and technologies․ Sewing communities and forums often discuss emerging trends, while manufacturer updates provide insights into innovative machine features; Exploring these resources helps you adapt to changing styles and improve your sewing skills․ By staying connected, you can embrace creativity and keep your projects fresh and modern, whether you’re a beginner or an experienced sewist․